Schmittel IT Systems

Add Windows HWID easily and quickly to Intune

Adding existing devices to Intune, Windows Autopilot, can be tedious and time-consuming. Microsoft has provided a script, but has skimped on the documentation.
With the following instructions, any administrator should be able to quickly and easily add a large number of devices to Autopilot at once.

Microsoft Intune

Foreword

The following documentation and instructions are intended for administrators who already have experience in the Microsoft 365 environment. It deals exclusively with adding hardware hashes to Intune in bulk (devices > 50). The following steps are based on a scenario in which the corresponding licences, e.g. M365 Business Premium, are already in use and all the necessary settings for Intune, device groups etc. have already been made.

Which methods are available?

  • Export of the hardware hashes (HWID) as a csv file and manual upload to Intune.
  • Upload hardware hashes directly to Intune. Administrator access data must be entered on the device each time.
  • Hardware hash upload directly to Intune without entering administrator username and password. Create an app registration once

We will focus on the last point, as Microsoft Learns is well documented for 1 and 2.

The following points lead to success

  1. Registration of the application in Entra ID (formerly Azure AD)
  2. Creation of the script
  3. Execution of the script
  4. Optional extension of the script functions

1. registration of the application in Entra ID

An app registration is created in Entra ID. To do this, the administrator opens -> entra.microsoft.com -> Applications -> App registration and clicks on "+ New registration" or simply clicks on the following link: Register application

  1. The name "Autopilot HWID App Reg" can be used. The name does not matter later.
    All other settings can be left as default.
  2. Click on "Register" (the button is at the bottom left)
  3. Select the previously created application in the"All applications" overview
  4. Click on "API authorisations" in the menu on the left
    "+ Add authorisation" -> Microsoft Graph -> "Application authorisations"
    Search for "DeviceManagementServiceConfig.ReadWrite.All"
    Select the authorisation and click on "Add authorisation"
  5. Then click on "Grant administrator consent for Tennant XY"
  6. A secret client key must now be created under "Certificates and secrets"
    Click on "+ New secret client key"
    The "Description" field can remain empty.
    An expiry date / period can be selected for the validity.
  7. Click the copy icon behind the value column
    The value is the App Secret
  8. For the script we still need App ID and Tennant ID
    You can find the AppID in the "All applications" overview
    The Tennatn ID can be found here under "Client ID"


2. create and customise scripts

Once the application has been created and all the necessary information is available, you can start editing the scripts. The scripts can be saved on a USB stick and then started by right-clicking "Run as administrator".

The "right-click-_run_as_admin.bat" file executes the hwid.ps1 file in Powershell with administrator rights. This ensures that all necessary modules, etc. can be installed

right-click-_run_as_admin.bat


@setlocal enableextensions
@cd /d "%~dp0"
powershell.exe -executionpolicy bypass -file .\hwid.ps1


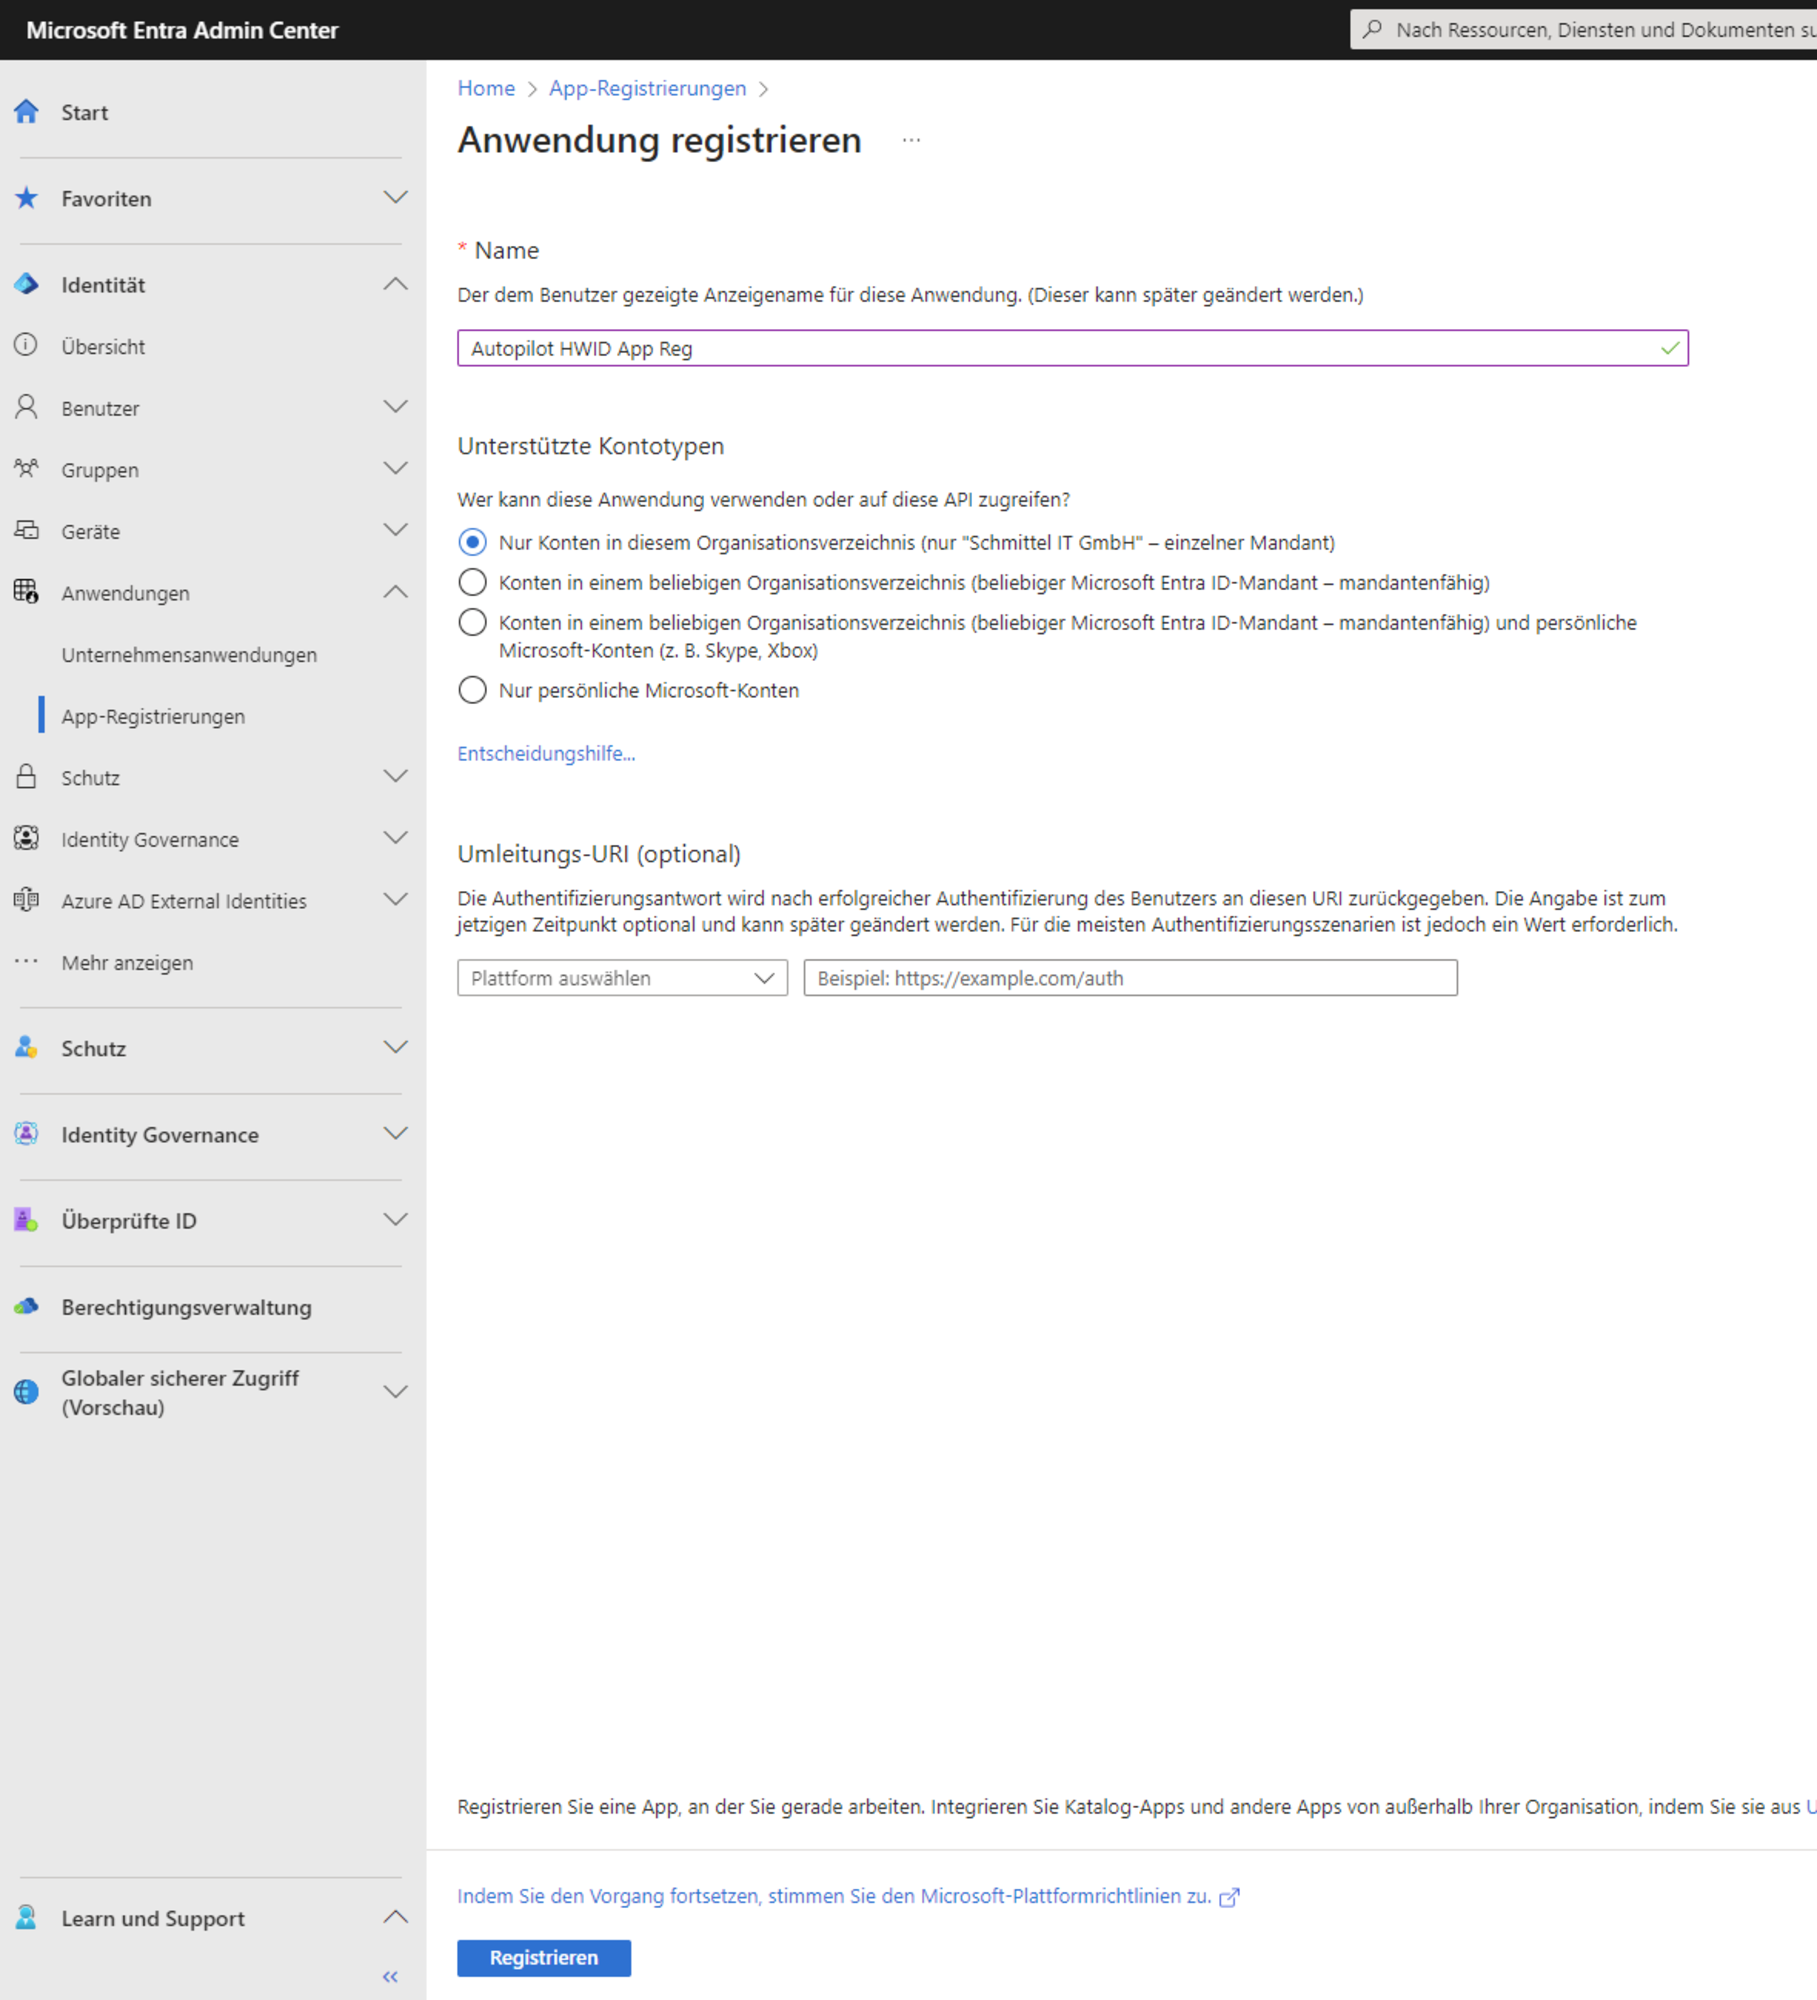
The file "hwid.ps1" contains the actual script, which needs to be slightly customised. XYZ must be filled with the values generated in the first part of the instructions.


[Net.ServicePointManager]::SecurityProtocol = [Net.SecurityProtocolType]::Tls12
$env:Path += ";C:\Program Files\WindowsPowerShell\Scripts"
Set-ExecutionPolicy -Scope Process -ExecutionPolicy RemoteSigned
Install-PackageProvider -Name NuGet -MinimumVersion 2.8.5.208 -Confirm:$false -Force:$true
Install-Script get-windowsautopilotinfo -Confirm:$false -Force:$true

Get-windowsautopilotInfo -Online -TenantId XYZ -AppId XYZ -AppSecret XYZ


If you execute the BAT file on a computer, the computer or its hardware hash is uploaded directly to Intune.

The script and thus the degree of automation can be further customised if required. More on this in the last part of the instructions

The script accepts the following arguments


-AssignedComputerName [string]
-GroupTag [string]
-AssignedUser [string] (UPN of the user)
-Partner
-AddToGroup [string]

Example 
Get-windowsautopilotInfo -Online -TenantId XYZ -AppId XYZ -AppSecret XYZ -AssignedComputerName Computer123 -GroupTag ComputerVertrieb -AssigendUser erica.musterfrau@schmittel-it.de


3. execute the script

There are several methods/scenarios for executing the script.

Scenario 1: You have ordered new devices but have forgotten to request the Windows Product Key ID from the manufacturer. With many manufacturers you will find this on every device packaging.

Scenario 2: You have devices that have not yet been set up and the packaging has already been disposed of. Start the device normally. As soon as the language prompt appears in the OOBE, press "Shift" + "F10" to open a CMD window.
Now switch to the USB stick. Depending on the device, the USB stick may have a different drive letter. Use D: to switch to the drive with the drive letter D.
Now execute the following command in CMD. The device can then be shut down.


powershell.exe -executionpolicy bypass -file .\hwid.ps1


Scenario 3: The devices are already in use by the user. The devices are all to be brought up to a standardised status and therefore completely reconfigured. You have neither Intune nor AD DS available. Download the script to a network drive, a USB stick or send it to the users as a ZIP archive by email. On the device, right-click on the BAT file and select Run as administrator.

Scenario 4: The devices are already in use by the user, but an AD DS is available. In this case, you are spoilt for choice. Either you create a GPO with the PS Script or you execute the command via WMI Remote.

4. optional customisation of the script

The degree of automation and standardisation can be significantly increased by adapting the script. It is therefore worth considering the following options.

-AssigendUser assigns the device to a user. Assigning the device to a user improves the user experience as the user only needs to enter their password.


$email = Read-Host "Please enter your e-mail address (UPN)"

[Net.ServicePointManager]::SecurityProtocol = [Net.SecurityProtocolType]::Tls12
$env:Path += ";C:\Program Files\WindowsPowerShell\Scripts"
Set-ExecutionPolicy -Scope Process -ExecutionPolicy RemoteSigned
Install-PackageProvider -Name NuGet -MinimumVersion 2.8.5.208 -Confirm:$false -Force:$true
Install-Script get-windowsautopilotinfo -Confirm:$false -Force:$true

Get-windowsautopilotInfo -Online -TenantId XYZ -AppId XYZ -AppSecret XYZ -AssignedUser $email


-GroupTag sets the group tag for the device. Group tags can be used to create dynamic groups in EntraID. Here you can work with a query or with a static variable


Get-windowsautopilotInfo -Online -TenantId XYZ -AppId XYZ -AppSecret XYZ -GroupTag $gTag
or
Get-windowsautopilotInfo -Online -TenantId XYZ -AppId XYZ -AppSecret XYZ -GroupTag GroupXYZ